Engineer Prints- DIY
- Maria Elizabeth
- Dec 15, 2020
- 4 min read
Updated: Dec 19, 2020

This post is special to me because this is what really got my wheels turning on starting this blog. I did these engineer prints for a huge blank wall in our home and I got so much positive feedback. It really made me want to share so much more of ME with all of you!
So many people have asked how I did these- so here is a full tutorial and steps of exactly what I did. This project made this room feel so much more like us showcasing our prized possessions and pulling the whole room together!
One of the first things you will want to think about before you even start is white/negative space. I thought it was important to capture the sizes of each kiddo (and Coop!)- this is where the white space comes in. The smaller the kiddo or subject, the more white space you want. So for Porter's picture I stepped back and allowed more empty space above him (although not as much as I would have originally liked- see below for how to edit). For Leona's there was less white space, making her appear larger. Of course you can always crop your images some after capturing them but you can't add more negative space above. The negative space is SO important.
1. Find a light/plain background to capture your pictures on. These prints are not super high
quality- only a couple bucks per image- so you will want to make sure the pictures you use speak for
themselves. Also, the more white space behind, the more your image will stand out and pop. I just used my iPhone to capture these.
Here are the images that I took without any edits:


2. Edit your images on your phone. For me, I simply brought the saturation all the way down (-100). This changed it to black and white just as I wanted. I ended up playing with mine a bit more to make them exactly what I pictured- you can do the same to suit your style. For me, I also up-ed the brightness quite a bit (between 80 and 85) as I felt like they were too dark and brought the contrast down just a bit. (between -15 and -25) I think the most important thing is to capture them in the same place and with the same lighting and use the same or very similar edits on the images. Believe it or not the images above were captured in the same space minutes apart, even though they look so different- craziness!!


3. This step isn't really required but I ended up with a second round of edits. I decided after I took the images and edited them (above) I really wanted 2 things to be different. I wanted Porter to have more negative space above him and I really wanted to completely remove the background. Even though the wall was light and white behind the kiddos and Coop, it just didn't seem basic enough for me- you could still see the wall texture behind them. For some this might be okay which is why I say this step is optional.
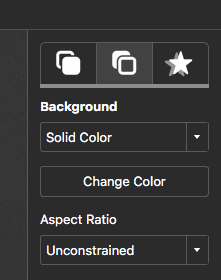
If you decide to remove the background you will need one of two things, a photo editing app or a free trial of an editing app- which is what I used. I downloaded Photoscissors on my Mac and they allowed me to edit a handful of images for free. I simply uploaded the images, used the background remover, and added a plain white background. With Leona's hair and Coopers fur I found it wasn't perfect but used the edge "feather radius"tool on the right toolbar. It was exactly what I was looking for. See the images below for screen shots of the tools I mentioned here and what the Photoscissors tool looks like. The other thing to note is that you can adjust the image location in your edit on the right side of the screen. (You can move the crosshairs up and down or side to side to position where you want your image. I did this with Porter's image to give more whitespace above him.)


4. This next step is important to set the images up for printing. When you save the image from your last edit make sure you save it with the the correct resolution and in the right size. Set your resolution to 200 pixels per inch, this will cut down on the graininess and your image size to match your frame- for me I did 24x36 inches. You can do this in Preview on your Mac OR in the Photoscissors app mentioned above BEFORE you save your project!


5. Finally you are ready to send them off to print! Some people have said their local print/office shops like OfficeMax or Staples have still been printing these. For me, they denied my request online. But I had luck with FedEx. When I printed them I printed them as an engineer print which is 24x36 by default. I ordered online and picked them up in store without a single issue and they cost about $5. As I said above these are not high quality images and print on standard paper.
6. Once I picked them up I put them into the frames I purchased from Michaels. I waited for them to go on a buy 1 get 2 free sale but they run different promotions all the time! Currently they are running the same buy one get two free sale online only (you can do in store pickup if you are cheap like me and don't want to pay for shipping tough), so if you are thinking about doing this fun project RUN!
Details
Frames: Michaels
Printed from: FedEx
I hope this all makes sense to you! If you take this project on I would love to see your final creations- Enjoy!!
xoxo
Maria Elizabeth
Comentarios